Conseils pour son challenge technique offline
Tech tests??
Applying for a job in tech usually comes with its set of technical tests. Live coding, deep dive, MCQ... each type of interview has its own set of advantages and disadvantages.
I've had both hats, but now I'm more of the interviewer. I wanted to share here the advice that can help you if you are going to have tech challenges to pass.
That does not mean that by following these tips, you will necessarily succeed in your interview!
I'm going to provide you keys to having a clearer, cleaner and more organized approach, which are qualities generally sought after by the people who will interview you. Obviously, the technical level and other qualities expected depend on the company and the position you are applying for. In any case, these tips are essential elements that can only work in your favor. Or even potentially play against you if they are not or not well presented.
We start this series with tips for the offline coding challenge! I am talking about this exercise with more or less precise instructions that you are given to work at home in a given time.
⚠️ I am a front-end developer and give advice rather focused on a JS / TS test, but most of them are applicable whatever the language and the type of challenge.
10 tips for rocking your front-end coding challenge
GOAL
As with any interview, your goal should always remain the same: to make the person in front want to work with you.
In the case of an offline technical test, you won't get direct interactions - the second objective will then be to make the person who will review your project want to read your code, and arouse their curiosity.
The instructions very carefully you will read
It may seem like an extremely basic advice, but it is nevertheless the most important. Read the instructions, make sure you understand them. In any doubt, do not hesitate reach out to the contacts who sent you the coding challenge to ask for clarification.
If the instructions are long or complex, you can also reformulate them on your side, in the form of a TODO list for example. It is also important at this stage to define the primary and secondary elements.
Example
Instructions: Create an application that displays a form with a text field and a "search" button. When you click on "search", display a list of items from the list [given to you via API or JSON file].
The instructions are super vague, sometimes on purpose. But the absolutely essential elements in this application are:
- A web app (one page, Vanilla, React, whatever you want)
- A text field and a submit button
- when clicking the submit button, display the list of items according to the search.
- it usually also implies a loading state, during which a loading spinner or a text will appear during the processing time
Et THAT'S IT !
Of course, it's then up to you to add some bonuses - which by definition should only come after the core elements are implemented:
- Form validation
- A specific message when the list is returned is empty
- Special attention given to UI/UX
- Accessibility
- Internationalization
- Deploy the application on the Github / Heroku / Netlify pages...
- [an endless list]
Is it really important?
Only once the instructions are clear and understood, and you have determined the main elements, you can begin to think of coding. Advantages of processing like this:
- you make sure to understand and not to forget anything about the given instructions. As a result, your work is more organized.
- the chosen solution may depend on the instructions: the exercise requires Vanilla / VueJS / React? Do I need SPA / routing? Do I have a complex state to manage (spoiler: no most of the time)? etc...
You start, and by definition, you will make your first technical and architectural choices, which brings me to the second point: keep it as simple as possible.
KISS - Keep It Simple Stupid
Even if you're passionate about the challenge you've been sent, you probably don't want or have the time to spend a lot of time on it. And no one [with common sense] can blame you for that. You have the right to choose such library or framework because you are comfortable with it to go faster. Or choose a more naive or simple implementation because it suffices for this project.
The technical test doesn't have to be a steroid-boosted application because you want to show the full extent of your knowledge. Rather choose to apply them intelligently and simply, according to the need for the application (this advice is also valid for any project). Whatever the tech you decide to go with, just remember to mention it in the documentation section - see below.
Example: I know Redux like the back of my hand. The application asks me to display a list of items; do I really need Redux for such use case?
Consistency you will keep
The goal is to create code that induces the least possible cognitive load for the reviewer. One way to help is to have consistent code: always the same spacings, import organization, variable naming convention...
There are a multitude of tools that help us on keeping our code consistent and easy to read. I simply name ESLint and Prettier, which respectively take only a few minutes to install.
In the same idea, impose yourself a convention (or according to the instructions) to name your functions, components and variables: camel case / snake case? Filenames starting with a capital letter? File hierarchy? ...
Be clear!
Not so much a matter of consistency, but try to keep the code as easy to read as possible. A third person will pass behind you and will try to understand what you have coded. There are simple ways to get your code a smoother read:
- name its variables, components and functions in a meaningful way
- limit identation: a function or component that contains too many levels of indentation can probably be split into a function/component/variable with a representative name
- avoid nested ternaries
- avoid files / functions that are too long. This can go through partterns like 1 component / function = 1 responsibility.
If you feel the need to add a comment in your code to help understand a particular element, do not hesitate to do so. However, it can sometimes be a code smell indicating that your code could be written differently or refactored - but it can sometimes provide value and clarification.
API tokens you won't commit
API tokens or keys or any other secrets you may need should never be committed or present in clear in your code. Use environment variables, and potentially a library to access them (example: dotenv).
Overall, this is good practice for any application you might write.
Tests you will write (if you have time)
In a perfect world, we have time to write tests: unit first, integration if possible and ideally a small end-to-end test. But - like in real life - it's time consuming. If you are running out of time and you haven't written your application in TDD (which is rarely the case for front-end), try if possible to add at least some unit / integrations tests on the main component of your application, or on the central logic. This will support the fact that you still know how to do it and have a concrete example to show.
And if you don't know how to do it or don't have the time, then write it in the "Possible improvements" section in your report (see documentation section below). Do not hesitate to indicate the scenarios you would have tested and which library you could have used - and why.
Commit messages
As in any project, it is better not to push all your code at once. Even if messages aren't perfect, your branch commits should reflect the iterative implementation of your application.
Example:

- init app
- create search form
- API call to search for the items
- list all the items
- loading state
- ...
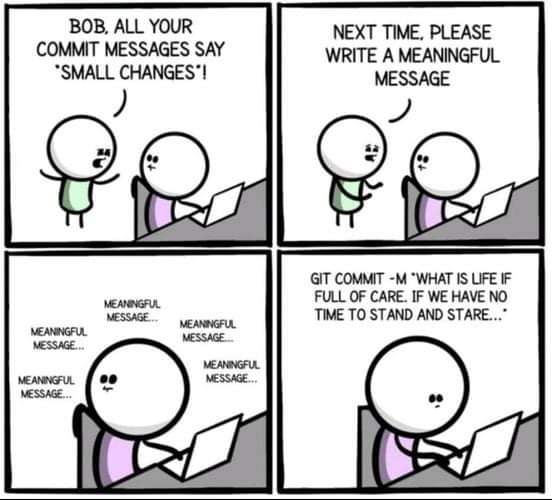
To go further on the types of commits, there are now commit conventions on which you can base yourself on, for example Conventional commits.
Documentation you will write
During a live interview we can easily speak our mind; but when you are alone with your exercise, it's often something we forget to do (even in the professional world, even the most seasoned): explain, document.
Code alone is not enough to describe your intentions, choices and thoughts.
When you submit your technical test, documentation can guide the person who reads your challenge through your approach.
At the base of your project, create a README.md if it does not already exist and describe your journey.
Run the app
As the basis, describe how to launch your application! Help the reviewer and save them time. It is also a good practice on any project to indicate how to launch the application as well as the tests if there are any
# Install dependencies
npm install

# Start application: this will run the app in the development mode.
# Open http://localhost:3000 to view it in the browser.
npm start

# Run unit tests
npm run test
PS: also remember to test these commands one last time before returning the project (yes it's a real life experience).
Technical choices
The technical choices made by a candidate during his challenge do not matter that much, as long as they are able to explain why they made them. Without explanation, it is difficult to say if the candidate went for it because it was what they knew or if it was out of conviction that it was the best choice for this use case. And even if the explanations can lead to questions, the technical choices and the explanations associated with them can then be challenged in the rest of the process.
Example 1: The application had a form and a button, which led me to create a very simple form validation in vanilla JS. However, on a production application that would need to grow, we can think of integrating a library such as [form validation lib of your choice].
Example 2: In order to deliver a pleasant user experience and to save time, I used [name of the UI library of your choice]. This library is quite light and offers the components I needed to easily compose the interface of the application.
The explanations can relate to the language (why Typescript?), the libraries / frameworks used, the way you have architected the code, the state management you have (or not) used...
All your choices come from decisions and experience. This process of explaining everything can only enlighten the person who will read your challenge and help to know you.
Possible improvements
You have implemented the essential elements of the challenge but you have spent all your time quota. Everything is going to be alright! Describe the elements that you did not have time to implement.
If you ever feel like you have implemented everything - stay humble, no code nor app is ever perfect. Look for improvements, missing points, technical or in terms of feature. It is extremely important to stay objective about your work. And if you still can't find what to say, you can always add notes on how the application could evolve in case we ask to scale (addition of features or people to work on it, mass user support , accessibility, optimizations...)
Example 1 - tech improvement: I didn't have time to implement unit tests for all components. As for [this component that you were able to test], the idea would be to continue this process for all the other components of the application.
Example 2 - the product improvement: the API returned me other properties which would have been interesting to show to the users like [name a property]. Moreover, it is possible to add a filter/sort/pagination function which would improve the user experience the returned list is sometimes very large.
This section may seem trivial, but it can save you if you just haven't had time to do everything. No need sweep dust under the carpet, the people who will read your challenge won't be fooled; take the lead, explain everything, and this will allow you to defend yourself during a potential debriefing interview.
Read youself!
When you are finally finished, I can only encourage you to step out of your body, and put yourself in the place of a third person. Review everything, the README, the code on Github (or whatever the platform). This will allow you to identify points for improvement - which you will either have time to correct or add as an area for improvement in the README!
Also check that
- there is nothing left of the boilerplate that you are not using (assets, unit tests that no longer correspond to anything, etc.)
- the intention behind your code is clear, that it is readable
Conclusion
I realize while writing this article that all of this advice can seem like a lot of mental work. Just keep in mind that your test doesn't have to be perfect. Also that:
- the person who will read you is a human - and potentially your future colleague! Help them to project themselves. The easier you make their job, the more satisfied they will be - it takes organization and explanations
- you have a limited time for this challenge: if you don't have one defined in the test that the company sent to you, give yourself a time limit that you will note in the README. It is not your main job to write this challenge and you should not spend excessive time on it.
I hope this was useful, good luck in your next interview! I'll continue this series with an article about live coding challenges.